
Table of Contents
Hey food lovers! Tired of endless scrolling for the best recipes? We’ve got you covered with a handpicked list of mouth-watering dishes for every meal—breakfast, lunch, dinner, snacks, and dessert. From comforting classics to bold twists, get ready to find your next favorite! Let’s get cooking!
Discovering Some of the Best Recipes Around
We’re not just listing names here; we’re diving into what makes these dishes special, what you’ll need, and how to bring these culinary gems to life in your own kitchen. Get ready for a flavor explosion!
Mini Pineapple Upside Down Cakes
Who doesn’t love a classic pineapple upside-down cake? These miniature versions capture all that nostalgic charm but in perfect, individual portions. Seriously, they are undeniably one of the best recipes for potlucks, parties, or just a sweet little pick-me-up. The caramelized pineapple top with that bright red cherry is iconic!

Ingredients:
- For the Topping:
- 1/4 cup unsalted butter, melted
- 1/2 cup packed light brown sugar
- Pineapple rings (canned, drained, about 6-8 rings depending on size), cut into smaller pieces if needed for mini muffin tins
- Maraschino cherries, halved or whole (about 12-16)
- For the Cake Batter:
- 1 1/2 cups all-purpose flour
- 1 tsp baking powder
- 1/4 tsp baking soda
- 1/4 tsp salt
- 1/2 cup unsalted butter, softened
- 3/4 cup granulated sugar
- 1 large egg
- 1 tsp vanilla extract
- 1/2 cup buttermilk (or milk with 1/2 tsp vinegar added, let sit 5 mins)
- 2 tbsp pineapple juice (reserved from the can)
Steps:
- Prep Time! Preheat your oven to 350°F (175°C). Grease a standard 12-cup muffin tin very well.
- Caramel Base: In a small bowl, mix the melted butter and brown sugar. Spoon about 1-2 teaspoons of this mixture into the bottom of each muffin cup. Place a piece of pineapple (or arrange smaller pieces) over the brown sugar mixture in each cup. Pop a cherry (or half) in the center of the pineapple.
- Mix Dry Ingredients: In a medium bowl, whisk together the flour, baking powder, baking soda, and salt. Set aside.
- Cream Butter & Sugar: In a larger bowl, use an electric mixer to beat the softened butter and granulated sugar until light and fluffy (about 2-3 minutes).
- Add Wet Ingredients: Beat in the egg and vanilla extract until just combined.
- Combine: Gradually add the dry ingredients to the wet ingredients, alternating with the buttermilk and pineapple juice. Start and end with the dry ingredients. Mix until just combined – don’t overmix!
- Fill & Bake: Carefully spoon the batter evenly over the pineapple and cherry mixture in each muffin cup, filling them about two-thirds full.
- Bake: Bake for 20-25 minutes, or until a toothpick inserted into the center of a cake comes out clean.
- Cool & Invert: Let the cakes cool in the muffin tin on a wire rack for about 5-10 minutes. This is important! Then, carefully run a thin knife around the edge of each cake. Place a large cutting board or baking sheet over the muffin tin and, carefully but quickly, flip the whole thing over. Gently lift the muffin tin off. If any toppings stick, just carefully place them back onto the cakes.
- Serve: Enjoy these little beauties warm or at room temperature. They are truly one of the best recipes for a sweet treat!
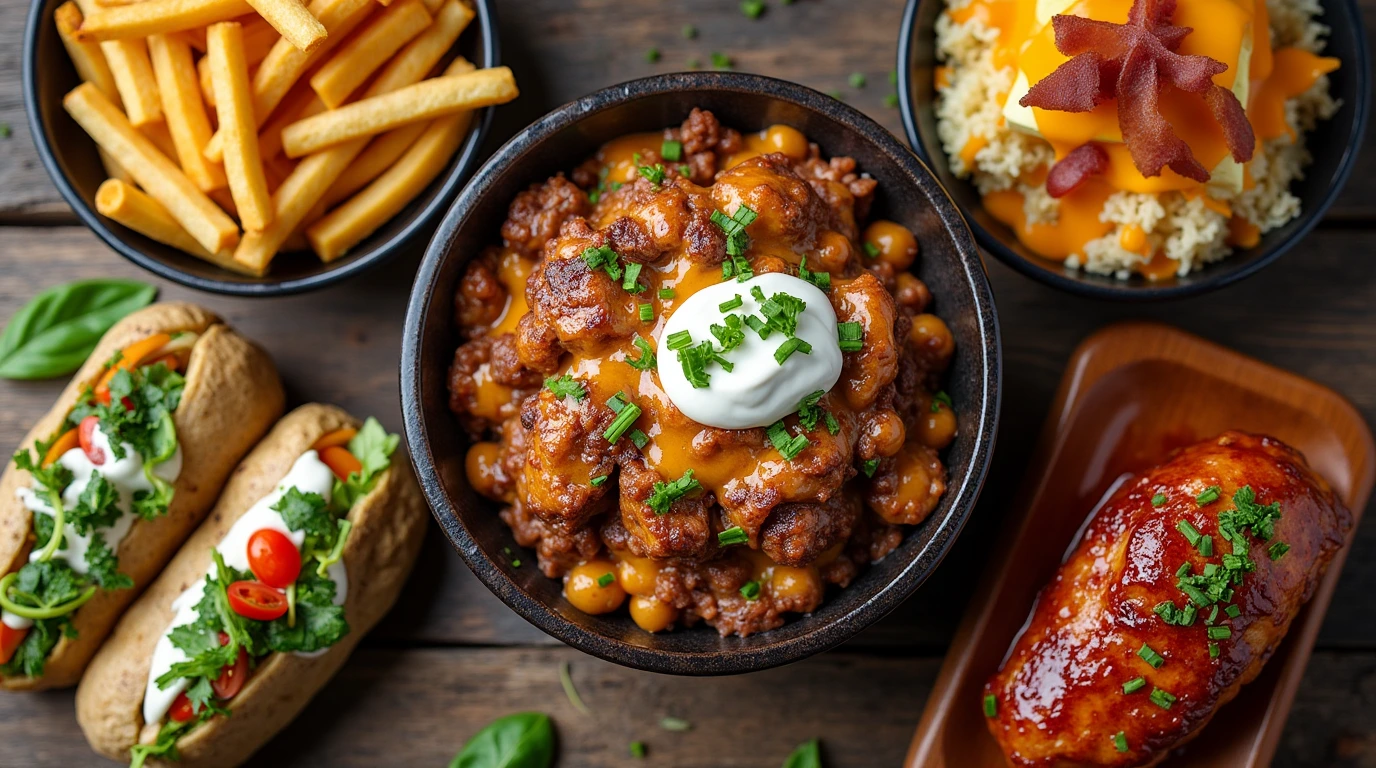
Loaded Beef and Fries Bowl: The Ultimate Comfort Food Mashup
Talk about satisfying! This isn’t just beef and fries; it’s an experience. Imagine crispy, golden fries forming the base for perfectly seasoned ground beef, gooey melted cheese, and all your favorite toppings. It’s like nachos met a burger bowl, and honestly? It’s one of the best recipes for a casual weeknight dinner or game day feast.
Ingredients:
- 1 lb ground beef (80/20 recommended for flavor)
- 1 packet taco seasoning (or your own blend: chili powder, cumin, paprika, garlic powder, onion powder, oregano, salt, pepper)
- 1/2 cup water or beef broth
- 1 bag (approx. 24-32 oz) frozen French fries (shoestring, crinkle-cut, steak fries – your choice!)
- 1 1/2 cups shredded cheese (cheddar, Monterey Jack, or a Mexican blend work great)
- Optional Toppings: Diced tomatoes, sliced jalapeños, sour cream or Greek yogurt, guacamole or diced avocado, chopped onions, salsa, chopped cilantro, sliced black olives
Steps:
- Fries First: Cook the French fries according to the package directions until golden brown and crispy. Whether you bake, air fry, or deep fry, get them nice and crisp!
- Brown the Beef: While the fries are cooking, brown the ground beef in a large skillet over medium-high heat, breaking it up with a spoon. Drain off any excess grease.
- Season It Up: Stir in the taco seasoning and water/broth. Bring the mixture to a simmer and let it cook for 5-7 minutes, or until the sauce has thickened slightly.
- Assemble the Bowls: Once the fries are ready, divide them among serving bowls.
- Layer the Goodness: Spoon the seasoned beef mixture generously over the fries in each bowl.
- Cheese Please: Sprinkle the shredded cheese evenly over the hot beef mixture. The heat should help it get nice and melty. You can also pop them under the broiler for a minute if you want extra meltiness – watch carefully!
- Load ‘Em Up: Now for the fun part! Add your desired toppings. Go wild! Sour cream, salsa, jalapeños, onions… pile them high!
- Devour: Serve immediately and enjoy this incredibly satisfying and undoubtedly one of the best recipes for a loaded treat.
Stuffed Vegetable Roll: A Flavorful and Versatile Delight
Looking for something a bit lighter but still packed with flavor? Enter the Stuffed Vegetable Roll. The beauty of this concept is its versatility – it could be savory veggies wrapped in flaky puff pastry, a fresh spring roll style, or even veggies tucked into a flatbread. It’s one of the best recipes because you can adapt it to what’s in season or what you have on hand.
Note: Since “Stuffed Vegetable Roll” is generic, we’ll create a version using puff pastry.
Ingredients
- 1 tbsp olive oil
- 1 onion, finely chopped
- 2 cloves garlic, minced
- 1 red bell pepper, finely chopped
- 1 zucchini, finely chopped or grated
- 1 carrot, grated
- 1 cup chopped mushrooms (cremini or button)
- 1/2 cup frozen peas or corn (optional)
- 1 tsp dried oregano or Italian seasoning
- Salt and freshly ground black pepper to taste
- 4 oz cream cheese, softened (or crumbled feta/goat cheese)
- 1 sheet (about 10 oz) frozen puff pastry, thawed according to package directions
- 1 egg, beaten (for egg wash)
- Sesame seeds or poppy seeds for topping (optional)
Steps:
- Sauté Veggies: Heat olive oil in a large skillet over medium heat. Add onion and cook until softened, about 3-4 minutes. Add garlic, bell pepper, zucchini, carrot, and mushrooms. Cook, stirring occasionally, until vegetables are tender-crisp, about 8-10 minutes. If using peas/corn, stir them in during the last couple of minutes.
- Season: Stir in the dried herbs, salt, and pepper. Taste and adjust seasoning as needed. Remove from heat and let the vegetable mixture cool slightly.
- Add Cheese: Once slightly cooled, stir in the softened cream cheese (or crumbled feta/goat cheese) until well combined.
- Prep Pastry: Preheat oven to 400°F (200°C). Line a baking sheet with parchment paper. Gently unfold the thawed puff pastry sheet on a lightly floured surface. If needed, roll it slightly larger.
- Assemble: Spread the vegetable and cheese mixture evenly over the puff pastry, leaving about a 1-inch border along one long edge.
- Roll It Up: Carefully roll the pastry up jelly-roll style, starting from the long edge opposite the border. Pinch the seam to seal. Place the roll seam-side down on the prepared baking sheet. You can tuck the ends under slightly if desired.
- Finishing Touches: Brush the entire surface of the roll with the beaten egg wash. If desired, sprinkle with sesame or poppy seeds. You can also score the top lightly with a knife in a decorative pattern (don’t cut all the way through).
- Bake: Bake for 25-30 minutes, or until the pastry is golden brown, puffed, and cooked through.
- Serve: Let the roll cool for a few minutes before slicing and serving. This is truly one of the best recipes for a vegetarian main or a stunning appetizer.
Gourmet Brioche Donuts – Dessert Medley Edition: Pure Indulgence

Forget your average donut. These are gourmet. Made with rich, buttery brioche dough, these donuts are lighter, fluffier, and provide the perfect canvas for a medley of decadent dessert-inspired toppings and fillings. Think crème brûlée, tiramisu, salted caramel pretzel… the possibilities make these some of the best recipes for impressing guests or treating yourself.
Note: Making brioche dough from scratch is involved. This will focus on the concept and potential fillings/toppings, assuming a base brioche donut.
Ingredients
- Base: Pre-made or homemade Brioche Donuts
- Fillings: Pastry cream (vanilla, chocolate, coffee), fruit compotes (strawberry, raspberry, blueberry), cheesecake filling, Nutella, Biscoff spread, lemon curd.
- Glazes: Classic vanilla glaze, chocolate ganache, salted caramel, maple glaze, fruit glazes.
- Toppings: Crushed cookies (Oreos, Biscoff), toasted nuts (almonds, pecans), sprinkles, chocolate shavings, fresh fruit, torched sugar (for crème brûlée style), crumbled pretzels, mini marshmallows, toasted coconut.
Steps:
- Prepare Components: Make your chosen fillings (like pastry cream or cheesecake filling) and glazes/ganaches ahead of time and let them cool/set as needed. Prep toppings by crushing cookies, toasting nuts, etc.
- Fill (if applicable): Use a piping bag with a filling tip to carefully inject cooled fillings into the center of the brioche donuts.
- Glaze/Dip: Dip the tops of the donuts into your chosen glaze or ganache, letting any excess drip off.
- Top It Off: While the glaze is still wet, sprinkle or arrange your desired toppings. Get creative! Combine textures and flavors.
- Special Finishes: For something like crème brûlée, sprinkle sugar on top of a vanilla pastry cream-filled donut and carefully torch it until caramelized.
- Serve: These gourmet creations, easily ranking among the best recipes for dessert lovers, are best enjoyed fresh on the day they are made.
BBQ Glazed Chicken Wings with Loaded Potato, Sweet Corn & Garlic Green Beans: A Full Plate Favorite
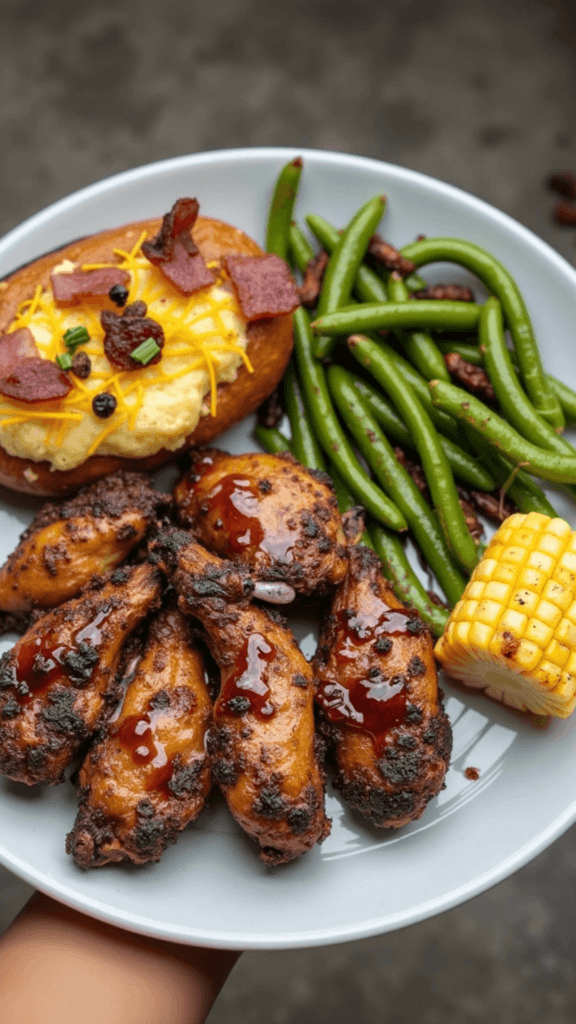
This isn’t just a recipe; it’s a whole meal. Sticky, smoky-sweet BBQ glazed wings are the star, but the supporting cast is just as crucial. Creamy, cheesy loaded potatoes, sweet bursts of corn, and vibrant garlic green beans make this one of the best recipes for a satisfying, well-rounded dinner that feels like a feast.
Ingredients
- For the Wings:
- 2 lbs chicken wings, patted dry
- 1 tbsp olive oil
- Salt and black pepper to taste
- 1 cup your favorite BBQ sauce
- Optional: 1-2 tbsp honey or brown sugar mixed into BBQ sauce for extra glaze
- For the Loaded Potato:
- 2 large russet potatoes, baked until tender
- 2-4 tbsp butter
- 1/4 cup milk or cream
- 1/2 cup shredded cheddar cheese
- 2-4 slices bacon, cooked and crumbled
- 2 tbsp chopped green onions or chives
- Salt and pepper to taste
- Optional: Sour cream for topping
- For the Corn:
- 1 can (15 oz) sweet corn, drained, or 1.5 cups frozen/fresh corn kernels
- 1 tbsp butter
- Salt and pepper to taste
- For the Garlic Green Beans:
- 1 lb fresh green beans, trimmed
- 1 tbsp olive oil
- 2-3 cloves garlic, minced
- Salt and pepper to taste
Steps:
- Prep Potatoes: Wash potatoes, prick them with a fork, and bake at 400°F (200°C) for 45-60 minutes, or until tender. (Alternatively, microwave them).
- Cook Wings: Preheat oven to 400°F (200°C). Toss wings with olive oil, salt, and pepper. Spread in a single layer on a foil-lined baking sheet (or on a rack over a sheet). Bake for 20 minutes. Flip wings and bake for another 20-25 minutes, or until cooked through and skin is starting to crisp.
- Glaze Wings: Remove wings from oven. Pour BBQ sauce (mixed with honey/sugar if using) over the wings and toss to coat thoroughly. Return to the oven for 5-10 minutes, or until the glaze is bubbly and caramelized. Keep an eye on them to prevent burning.
- Make Loaded Potato Filling: While wings finish, cut baked potatoes in half lengthwise. Scoop out the insides into a bowl, leaving a thin shell. Mash the potato insides with butter and milk/cream until smooth. Stir in most of the shredded cheese, crumbled bacon, green onions, salt, and pepper.
- Stuff Potatoes: Spoon the mixture back into the potato skins. Top with remaining cheese. You can pop these back in the oven or under the broiler for a few minutes to melt the cheese if desired.
- Cook Corn: Melt butter in a small saucepan over medium heat. Add corn, salt, and pepper. Cook, stirring occasionally, until heated through (about 5 minutes).
- Sauté Green Beans: Heat olive oil in a skillet over medium-high heat. Add green beans and cook, stirring occasionally, for 5-7 minutes until tender-crisp. Add minced garlic during the last minute of cooking, along with salt and pepper. Stir until fragrant.
- Plate It Up: Serve the delicious BBQ wings alongside a loaded potato half, a scoop of sweet corn, and garlic green beans. This is undeniably one of the best recipes for a complete, satisfying meal!
Big Mac Sliders: Iconic Flavor in Mini Form

Craving that special sauce, lettuce, cheese, pickles, onions on a sesame seed bun… but maybe in a more shareable format? Big Mac Sliders deliver! Using sweet Hawaiian rolls as the base makes these ridiculously easy and fun to assemble. They capture the essence, making them one of the best recipes for parties, game days, or just a fun family dinner.
Ingredients
- 1 lb ground beef
- 1 tsp salt
- 1/2 tsp black pepper
- 1/2 cup finely chopped onion, divided
- 1 package (12 count) Hawaiian sweet rolls
- 6 slices American cheese
- 1/2 cup shredded iceberg lettuce
- 1/4 cup dill pickle slices (sandwich stackers work well)
- 2 tbsp melted butter
- 1 tsp sesame seeds
- For the “Special Sauce”:
- 1/2 cup mayonnaise
- 2 tbsp French dressing (or Catalina)
- 1 tbsp sweet pickle relish
- 1 tbsp finely minced white onion
- 1 tsp white vinegar
- 1 tsp granulated sugar
- Pinch of salt
Steps:
- Make the Sauce: In a small bowl, whisk together all the “Special Sauce” ingredients. Cover and refrigerate for at least 30 minutes for the flavors to meld. This sauce is key to making these taste like the real deal!
- Prep Rolls & Cook Beef: Preheat oven to 350°F (175°C). Without separating the Hawaiian rolls, slice the entire slab in half horizontally. Place the bottom half in a 9×13 inch baking dish. Brown the ground beef in a skillet over medium-high heat, seasoning with salt and pepper. Drain off excess grease. Stir in about half of the chopped onion (reserve the rest for topping).
- Assemble: Spread the cooked beef mixture evenly over the bottom slab of rolls. Layer the American cheese slices over the beef. Spread a generous layer of the “Special Sauce” over the cheese. Top with the remaining chopped raw onion, shredded lettuce, and pickle slices. Place the top slab of rolls back on.
- Butter & Bake: Brush the tops of the rolls with the melted butter and sprinkle evenly with sesame seeds. Cover the dish loosely with foil.
- Bake: Bake for 15-20 minutes, or until the cheese is melted and the sliders are heated through. Remove the foil for the last 5 minutes to let the tops get slightly golden.
- Serve: Carefully lift the sliders out of the dish using spatulas. You can slice them into individual sliders before serving or let guests pull them apart. Serve immediately with extra “Special Sauce” on the side. Definitely one of the best recipes for a fun twist on a classic!
Louisiana Red Beans and Rice: A Soulful Southern Staple

Creamy, smoky, and deeply satisfying, Louisiana Red Beans and Rice is pure comfort food. Traditionally simmered for hours, often with smoked sausage or ham hock, it’s a dish steeped in tradition (often served on Mondays!). While it takes time, the result is one of the absolute best recipes for a hearty, flavorful, and budget-friendly meal.
Ingredients
- 1 lb dried small red beans, rinsed and soaked overnight (or quick-soaked)
- 1 tbsp olive oil or bacon drippings
- 1 large onion, chopped
- 1 green bell pepper, chopped
- 2-3 celery stalks, chopped (the “Holy Trinity”)
- 3-4 cloves garlic, minced
- 1 lb smoked andouille sausage, sliced (or other smoked sausage/ham hock)
- 6-8 cups chicken or vegetable broth (or water)
- 1 bay leaf
- 1 tsp dried thyme
- 1/2 tsp cayenne pepper (or more, to taste)
- Salt and freshly ground black pepper to taste
- Hot cooked white rice, for serving
- Optional Garnishes: Chopped green onions, hot sauce
Steps:
- Soak Beans: Rinse dried beans and soak them in plenty of water overnight. Alternatively, use the quick-soak method: cover beans with water in a pot, bring to a boil, boil for 2 minutes, then turn off heat, cover, and let sit for 1 hour. Drain and rinse beans after soaking.
- Sauté Trinity & Sausage: Heat oil or bacon drippings in a large pot or Dutch oven over medium heat. Add chopped onion, bell pepper, and celery. Cook until softened, about 5-7 minutes. Add minced garlic and cook for another minute until fragrant. Add the sliced sausage and cook for a few minutes until lightly browned.
- Combine & Simmer: Add the drained, soaked beans to the pot. Pour in enough broth or water to cover the beans by about 2 inches. Add the bay leaf, dried thyme, and cayenne pepper. Bring the mixture to a boil.
- Low & Slow: Once boiling, reduce the heat to low, cover the pot loosely (leaving a small gap for steam to escape), and simmer for 2-3 hours, or until the beans are very tender and creamy. Stir occasionally, adding more broth or water if the mixture becomes too thick or dry.
- Creamy Finish: Once beans are tender, remove about 1/2 cup of the beans and some liquid. Mash them with a fork or immersion blender and stir the mashed beans back into the pot. This helps thicken the sauce and makes it creamier. Remove the bay leaf.
- Season: Taste and season generously with salt and black pepper. Add more cayenne if you like it spicier.
- Serve: Ladle the red beans and sausage generously over bowls of hot cooked white rice. Garnish with chopped green onions and offer hot sauce on the side. This soulful dish is truly one of the best recipes from Louisiana cuisine.
Vanilla Crème Brûlée Cupcakes with Fresh Raspberries: Elegance in a Cup

Imagine the delicate flavor of vanilla bean, the creamy richness of custard, the satisfying crack of caramelized sugar, and the bright tang of fresh raspberries – all combined in a cupcake! These Vanilla Crème Brûlée Cupcakes are sophisticated yet fun, making them one of the best recipes for showers, celebrations, or when you just want to feel a little fancy.
Ingredients
- For the Vanilla Cupcakes:
- 1 1/2 cups all-purpose flour
- 1 1/2 tsp baking powder
- 1/4 tsp salt
- 1/2 cup unsalted butter, softened
- 1 cup granulated sugar
- 2 large eggs
- 1 tsp vanilla extract (or seeds from 1/2 vanilla bean)
- 1/2 cup milk
- For the Pastry Cream Filling:
- 1 cup whole milk
- 1/4 cup granulated sugar
- 2 large egg yolks
- 2 tbsp cornstarch
- 1 tbsp unsalted butter
- 1/2 tsp vanilla extract
- For the Brûlée Topping:
- Approx. 1/4 – 1/2 cup granulated sugar
- Garnish:
- Fresh raspberries
Steps:
- Make Pastry Cream (Ahead): In a saucepan, heat milk until just simmering. While heating, whisk egg yolks, sugar, and cornstarch in a bowl until pale. Gradually whisk about half of the hot milk into the egg mixture (tempering). Pour the tempered egg mixture back into the saucepan with the remaining milk. Cook over medium heat, whisking constantly, until the mixture thickens and boils (about 2-3 minutes). Remove from heat, stir in butter and vanilla extract. Transfer to a bowl, press plastic wrap directly onto the surface to prevent a skin, and chill completely (at least 2 hours).
- Make Cupcakes: Preheat oven to 350°F (175°C). Line a 12-cup muffin tin with paper liners. Whisk together flour, baking powder, and salt in a bowl. In a separate large bowl, cream butter and sugar until light and fluffy. Beat in eggs one at a time, then stir in vanilla. Alternately add the flour mixture and milk to the creamed mixture, beginning and ending with flour. Mix until just combined.
- Bake Cupcakes: Divide batter evenly among liners. Bake for 18-22 minutes, or until a toothpick inserted into the center comes out clean. Let cool in the tin for a few minutes before transferring to a wire rack to cool completely.
- Fill Cupcakes: Once cupcakes are completely cool, use an apple corer or small knife to remove a small cone from the center of each cupcake (don’t go all the way through). Fill a piping bag (or a ziplock bag with the corner snipped) with the chilled pastry cream and pipe the cream into the holes in each cupcake.
- Brûlée the Tops: This is the fun part! Sprinkle about 1-2 teaspoons of granulated sugar evenly over the top of each filled cupcake, covering the pastry cream. Using a kitchen torch, carefully move the flame back and forth over the sugar until it melts, bubbles, and caramelizes into a golden-brown, hard crust. Work quickly and be careful not to burn the cupcake itself. If you don’t have a torch, you could try the broiler, but watch EXTREMELY closely as it can burn in seconds and may melt the frosting.
- Garnish & Serve: Top each cupcake with a fresh raspberry (or two!). These are best served soon after torching to enjoy the contrast between the cracked sugar top and the creamy filling. Unquestionably, one of the best recipes for a show-stopping dessert.
Tater Tot Breakfast Bowl with Sausage Gravy: A Hearty Morning Start

Move over, boring cereal! This Tater Tot Breakfast Bowl is here to make mornings awesome. Crispy, golden tater tots provide the perfect base for rich, creamy, savory sausage gravy. Add an egg, some cheese – boom! It’s easily one of the best recipes for a weekend brunch or a seriously satisfying breakfast-for-dinner situation.
Ingredients
- 1 bag (approx. 16-20 oz) frozen tater tots
- 1 lb bulk breakfast sausage (mild or hot)
- 1/4 cup all-purpose flour
- 2 – 2 1/2 cups whole milk
- Salt and freshly ground black pepper to taste
- Optional additions: Cooked scrambled or fried eggs, shredded cheddar cheese, chopped green onions, hot sauce
Steps:
- Crisp the Tots: Cook the tater tots according to package directions until golden brown and very crispy. Baking or air frying works best for maximum crispiness.
- Cook Sausage: While tots are cooking, crumble the breakfast sausage into a large skillet over medium-high heat. Cook, breaking it up, until browned and cooked through. Do NOT drain the grease – that’s flavor!
- Make the Gravy Roux: Reduce the heat to medium. Sprinkle the flour over the cooked sausage and drippings in the skillet. Stir constantly and cook for about 1-2 minutes until the flour is absorbed and lightly golden. This cooks out the raw flour taste.
- Add Milk Slowly: Gradually whisk in the milk, a little at a time, ensuring there are no lumps. Keep whisking as you add more milk.
- Simmer & Thicken: Bring the mixture to a gentle simmer, stirring frequently. Let it cook for 5-8 minutes, or until the gravy has thickened to your desired consistency. It will thicken more as it cools slightly.
- Season: Taste the gravy and season generously with salt and lots of freshly ground black pepper. Remember the sausage is already salty, so taste before adding too much salt.
- Assemble Bowls: Divide the crispy tater tots among serving bowls.
- Smother & Top: Ladle the hot sausage gravy generously over the tater tots.
- Add Extras (Optional but Recommended!): Top with a cooked egg (fried or scrambled), sprinkle with shredded cheddar cheese, and garnish with chopped green onions. A dash of hot sauce doesn’t hurt either!
- Serve Hot: Dig in immediately! This is hands-down one of the best recipes for a comforting and hearty breakfast.
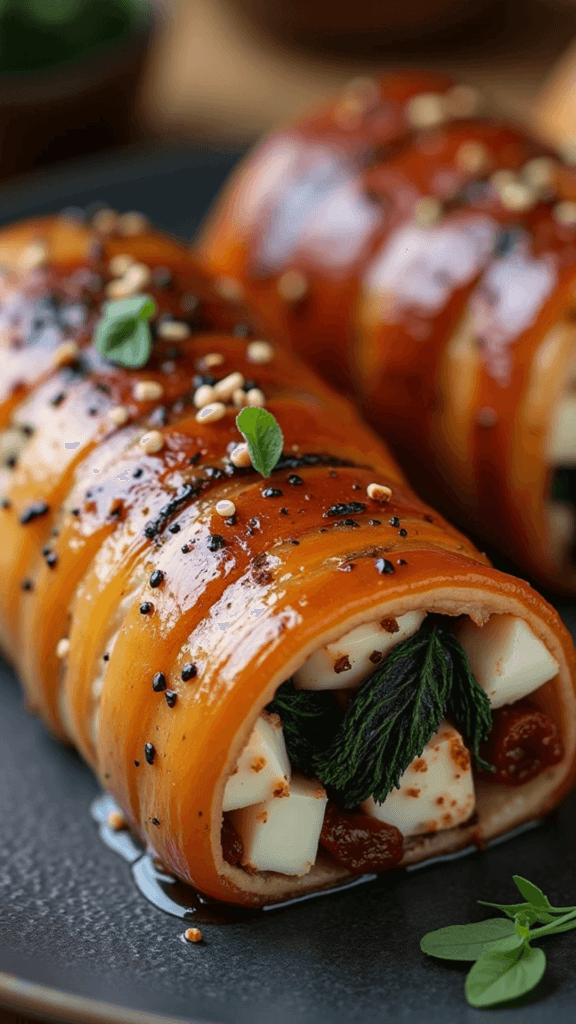
Mozzarella Pepperoni Croissant Rolls: Pizza Meets Pastry Perfection

Imagine the flaky layers of a croissant wrapped around zesty pepperoni and melted, gooey mozzarella cheese. Yep, it’s as amazing as it sounds! These Mozzarella Pepperoni Croissant Rolls are incredibly easy to make using refrigerated croissant dough and are one of the best recipes for a quick snack, appetizer, or fun lunchbox addition.
Ingredients
- 1 tube (8 oz) refrigerated crescent roll dough
- Approx. 24-32 slices of pepperoni (regular or mini)
- 4 sticks mozzarella string cheese, cut in half lengthwise (or 1 cup shredded mozzarella)
- Optional: 1 tbsp melted butter, 1/4 tsp garlic powder, 1/4 tsp dried oregano or Italian seasoning, grated Parmesan cheese for topping
Steps:
- Prep: Preheat oven to 375°F (190°C). Unroll the crescent dough and separate it into the 8 triangles along the perforations.
- Layer Ingredients: On the wide end of each triangle, place 3-4 slices of pepperoni. Top the pepperoni with half a stick of string cheese (or a sprinkle of shredded mozzarella).
- Roll ‘Em Up: Starting from the wide end, carefully roll up each triangle towards the pointed end. Place the rolls point-side down on an ungreased baking sheet (or one lined with parchment paper).
- Optional Topping: In a small bowl, mix the melted butter with garlic powder and dried herbs. Brush this mixture lightly over the tops of the croissant rolls. Sprinkle with grated Parmesan cheese, if desired.
- Bake: Bake for 10-13 minutes, or until the croissants are golden brown and the cheese is melted and bubbly.
- Serve: Let cool slightly before serving. These are fantastic dipped in warm marinara or pizza sauce! Definitely one of the best recipes for a quick, cheesy bite.
Strawberry Cheesecake Stuffed Donuts: Dessert Heaven

Get ready for pure decadence. Soft, fluffy donuts filled generously with a creamy, tangy strawberry cheesecake mixture. Need we say more? These are easily one of the best recipes when you want to go all-out on dessert. They combine two beloved treats into one unforgettable experience.
Note: This assumes you have basic plain donuts ready for filling (store-bought or homemade).
Ingredients
- 8 oz cream cheese, softened
- 1/2 cup powdered sugar
- 1/4 cup strawberry preserves or jam (good quality)
- 1/2 tsp vanilla extract
- Optional: 1/4 cup finely diced fresh strawberries
- For Assembly:
- 6-8 plain donuts (yeast or cake style, unfilled)
- Optional: Extra powdered sugar for dusting, or a simple glaze (powdered sugar + milk)
Steps:
- Make Cheesecake Filling: In a medium bowl, beat the softened cream cheese with an electric mixer until smooth and creamy. Gradually beat in the powdered sugar until well combined. Beat in the strawberry preserves and vanilla extract until smooth. If using fresh strawberries, gently fold them in.
- Chill Filling (Optional but Recommended): For easier piping, cover the bowl and chill the cheesecake filling in the refrigerator for about 30 minutes to firm up slightly.
- Prepare Donuts: Using a small knife or the end of a wooden spoon handle, carefully make a hole in the side of each donut, creating a pocket for the filling without going all the way through.
- Fill Donuts: Transfer the cheesecake filling to a piping bag fitted with a round or star tip (or a ziplock bag with the corner snipped). Carefully insert the tip into the hole in each donut and gently squeeze to fill the donut generously. You’ll feel it get heavier.
- Finish: Dust the filled donuts with powdered sugar, or drizzle with a simple glaze if desired.
- Serve: These Strawberry Cheesecake Stuffed Donuts are best enjoyed fresh. Store any leftovers in the refrigerator. Truly one of the best recipes for an indulgent treat!
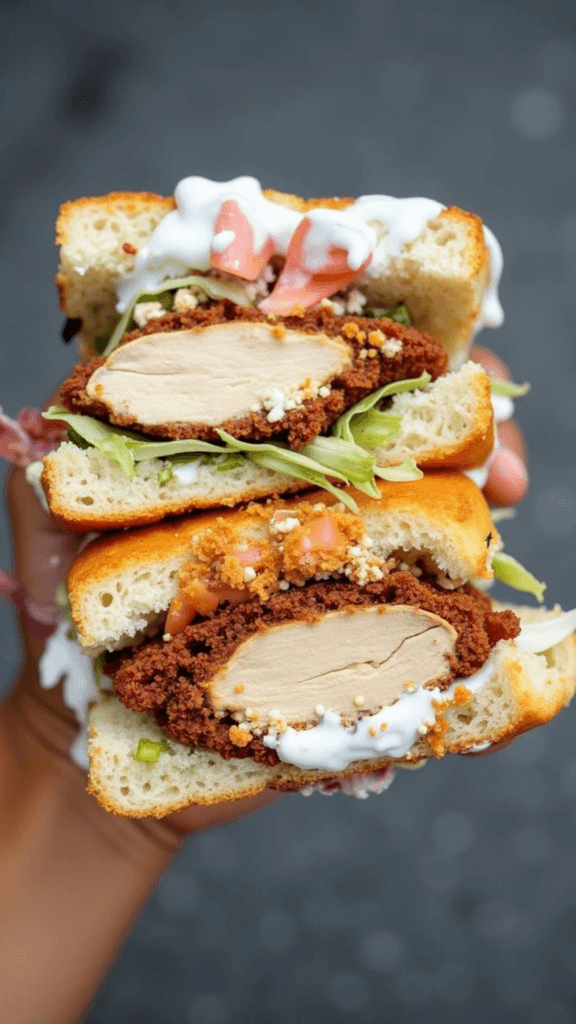
Buffalo Chicken Cheesesteak: A Spicy, Cheesy Masterpiece

Two iconic sandwiches collide! Take the tender chicken, melted cheese goodness of a Philly cheesesteak and give it a fiery kick with classic buffalo sauce. Served on a toasted roll, it’s messy, flavorful, and absolutely addictive. It’s one of the best recipes for game day or anytime you crave bold flavors.
Ingredients
- 1 tbsp olive oil
- 1 lb boneless, skinless chicken breasts, thinly sliced or chopped small
- Salt and black pepper to taste
- Optional: 1/2 onion, thinly sliced; 1/2 green bell pepper, thinly sliced
- 1/3 – 1/2 cup buffalo wing sauce (like Frank’s RedHot Wings sauce), plus more for drizzling
- 4 slices provolone cheese (or American or Cheese Whiz)
- 2 hoagie rolls or submarine rolls, split lengthwise
- Optional: Butter for toasting rolls, ranch or blue cheese dressing for serving
Steps:
- Sauté Chicken (and Veggies): Heat olive oil in a large skillet or griddle over medium-high heat. Add the thinly sliced chicken (and onions/peppers, if using). Season with salt and pepper. Cook, stirring occasionally, until the chicken is cooked through and the vegetables are softened (about 5-8 minutes).
- Sauce It Up: Reduce the heat to low. Pour the buffalo wing sauce over the chicken mixture in the skillet. Stir well to coat everything evenly. Let it simmer for a minute or two for the flavors to meld.
- Melt the Cheese: Divide the chicken mixture into two portions in the skillet. Place 2 slices of provolone cheese over each portion. Let the cheese melt over the chicken mixture (you can cover the skillet for a minute to speed this up).
- Toast Rolls (Optional but Recommended): While the cheese melts, lightly butter the cut sides of the hoagie rolls and toast them on a separate griddle, under the broiler, or in the skillet until golden brown.
- Assemble: Carefully scoop one portion of the cheesy buffalo chicken mixture onto each toasted roll using a spatula.
- Serve: Drizzle with extra buffalo sauce and/or ranch or blue cheese dressing, if desired. Serve immediately. This fusion sandwich is definitely one of the best recipes for spice lovers!
TASTY CAJUN SHRIMP: Bold Flavor, Quick Cooking

Need a fast track to flavor town? Cajun Shrimp is your ticket! Plump, juicy shrimp tossed in a bold blend of Cajun spices cook up in minutes. They’re incredibly versatile – serve them over rice, pasta, grits, in tacos, or just eat them straight up! This is one of the best recipes for a quick weeknight dinner with a kick.
Ingredients
- 1 lb large shrimp, peeled and deveined (tail on or off)
- 1-2 tbsp olive oil or butter
- 2-3 cloves garlic, minced
- 1 1/2 – 2 tbsp Cajun seasoning (store-bought or homemade*)
- Optional: Pinch of cayenne pepper for extra heat, squeeze of fresh lemon juice, chopped fresh parsley for garnish
- Homemade Cajun Seasoning (mix): 2 tsp paprika, 1 tsp salt, 1 tsp garlic powder, 1/2 tsp black pepper, 1/2 tsp onion powder, 1/2 tsp dried oregano, 1/2 tsp dried thyme, 1/4-1/2 tsp cayenne pepper.
Steps:
- Prep Shrimp: Pat the peeled and deveined shrimp thoroughly dry with paper towels. This helps them sear rather than steam. Place shrimp in a bowl.
- Season: Add the Cajun seasoning (and extra cayenne, if using) to the shrimp and toss well to coat evenly.
- Cook Garlic: Heat olive oil or butter in a large skillet over medium-high heat. Add the minced garlic and cook for about 30 seconds until fragrant (be careful not to burn it).
- Sear Shrimp: Add the seasoned shrimp to the hot skillet in a single layer (cook in batches if necessary to avoid overcrowding). Cook for 1-2 minutes per side, or just until the shrimp turn pink and opaque and curl slightly. Don’t overcook!
- Finish: Remove the skillet from the heat. If desired, squeeze fresh lemon juice over the shrimp and toss.
- Serve: Garnish with chopped fresh parsley, if desired. Serve immediately. This simple yet impactful dish is one of the best recipes for fast, flavorful seafood.
Loaded Lava Crunch Wrap: A Fast-Food Inspired Favorite at Home
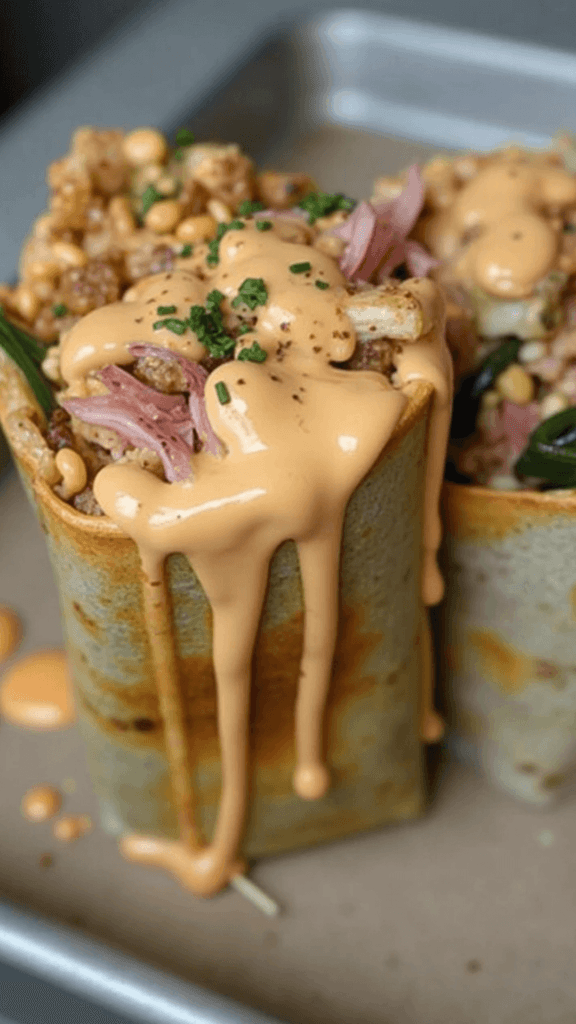
Inspired by a certain fast-food legend, this wrap takes things up a notch. Seasoned ground beef, nacho cheese sauce, a crunchy tostada shell, lettuce, tomato, and sour cream all wrapped up in a giant tortilla and grilled to golden perfection. The “lava” likely refers to a spicy cheese sauce or element, making it one of the best recipes for recreating takeout thrills.
Ingredients
- 1 lb ground beef
- 1 packet taco seasoning
- 1/2 cup water
- 4 large (burrito size) flour tortillas
- 4 crunchy tostada shells
- Approx. 1 cup nacho cheese sauce (store-bought or homemade, potentially spiced up with hot sauce for “lava” effect)
- 1 cup shredded lettuce
- 1/2 cup diced tomatoes
- 1/2 cup sour cream
- Optional: Spicy ranch, jalapeños for extra heat
Steps:
- Cook Beef: Brown the ground beef in a skillet, drain grease. Stir in taco seasoning and water, simmer until thickened.
- Warm Tortillas: Briefly warm the large flour tortillas to make them more pliable (microwave for 15-20 seconds).
- Assemble – Layer 1: Lay one large tortilla flat. Spread a layer of the nacho cheese sauce in the center, roughly the size of the tostada shell. Add a scoop of the seasoned ground beef over the cheese sauce.
- Assemble – Layer 2 (Crunch): Place a crunchy tostada shell on top of the beef layer.
- Assemble – Layer 3: Spread sour cream evenly over the tostada shell. Top with shredded lettuce and diced tomatoes (and jalapeños/spicy ranch if using).
- Fold: This is the tricky part! Fold the edges of the large tortilla up over the filling, starting with one edge and working your way around, creating pleats. You want to completely enclose the filling. You might need a small piece of tortilla to patch the center if needed.
- Grill: Heat a large skillet or griddle over medium heat (you can add a little oil or butter if desired). Carefully place the wrap seam-side down onto the hot skillet. Cook for 2-4 minutes, or until golden brown and crispy.
- Flip & Grill: Carefully flip the wrap and cook the other side for another 2-4 minutes until golden brown and heated through.
- Serve: Cut in half (optional) and serve immediately. This homemade version is easily one of the best recipes for satisfying that crunch wrap craving.
Golden Melt Chocolate Chip Cookies: The Perfect Classic
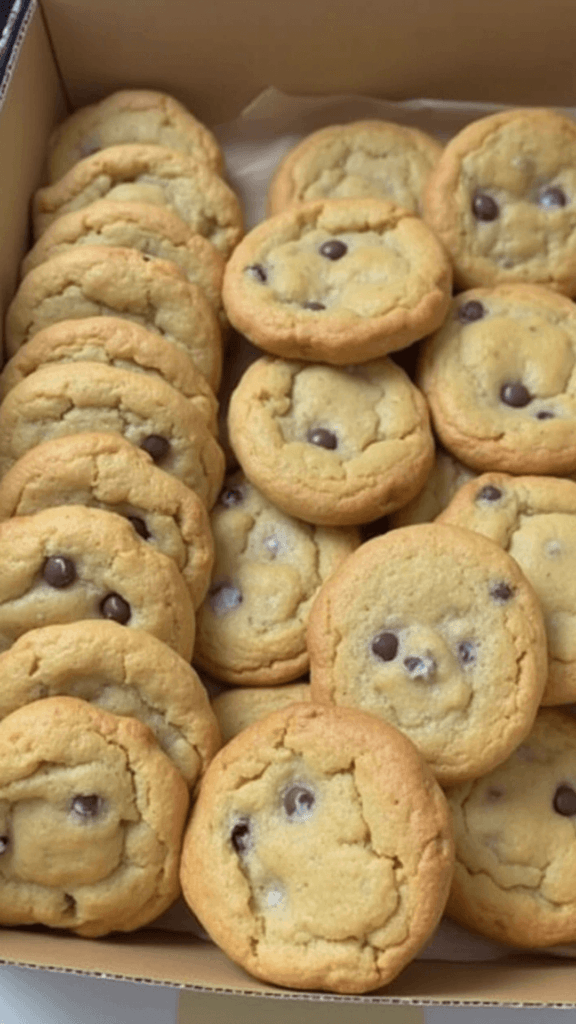
Is there anything better than a truly perfect chocolate chip cookie? These “Golden Melt” cookies promise that ideal texture: slightly crisp, golden-brown edges giving way to a soft, chewy, and melt-in-your-mouth center, packed with pools of melted chocolate. It’s a timeless classic and arguably one of the best recipes everyone needs in their repertoire.
Ingredients
- 1 cup (2 sticks) unsalted butter, softened
- 3/4 cup packed light brown sugar
- 1/2 cup granulated sugar
- 1 large egg + 1 egg yolk
- 2 tsp vanilla extract
- 2 1/4 cups all-purpose flour
- 1 tsp baking soda
- 1/2 tsp salt
- 2 cups semi-sweet chocolate chips (or a mix of chips and chopped chocolate chunks)
- Optional: Flaky sea salt for sprinkling
Steps:
- Cream Butter & Sugars: In a large bowl, using an electric mixer, beat the softened butter, brown sugar, and granulated sugar together until light and fluffy (about 3-4 minutes).
- Add Wet Ingredients: Beat in the egg, egg yolk, and vanilla extract until well combined.
- Combine Dry Ingredients: In a separate bowl, whisk together the flour, baking soda, and salt.
- Mix Dough: Gradually add the dry ingredients to the wet ingredients, mixing on low speed until just combined. Be careful not to overmix.
- Stir in Chocolate: Stir in the chocolate chips/chunks by hand using a sturdy spatula.
- Chill Dough (Highly Recommended): Cover the bowl tightly with plastic wrap and chill the cookie dough in the refrigerator for at least 30 minutes, or preferably 1-2 hours (or even overnight). Chilling prevents spreading and deepens flavor.
- Prep for Baking: Preheat oven to 375°F (190°C). Line baking sheets with parchment paper.
- Scoop Dough: Scoop rounded tablespoons (or use a medium cookie scoop) of chilled dough onto the prepared baking sheets, leaving about 2 inches between cookies.
- Bake: Bake for 9-12 minutes, or until the edges are lightly golden brown, and the centers still look slightly soft and underdone. Do not overbake!
- Cool & Finish: Let the cookies cool on the baking sheets for 5-10 minutes – they will continue to cook slightly and set up. If desired, sprinkle with flaky sea salt while they are still warm. Transfer cookies to a wire rack to cool completely. These are undeniably one of the best recipes for classic chocolate chip perfection!
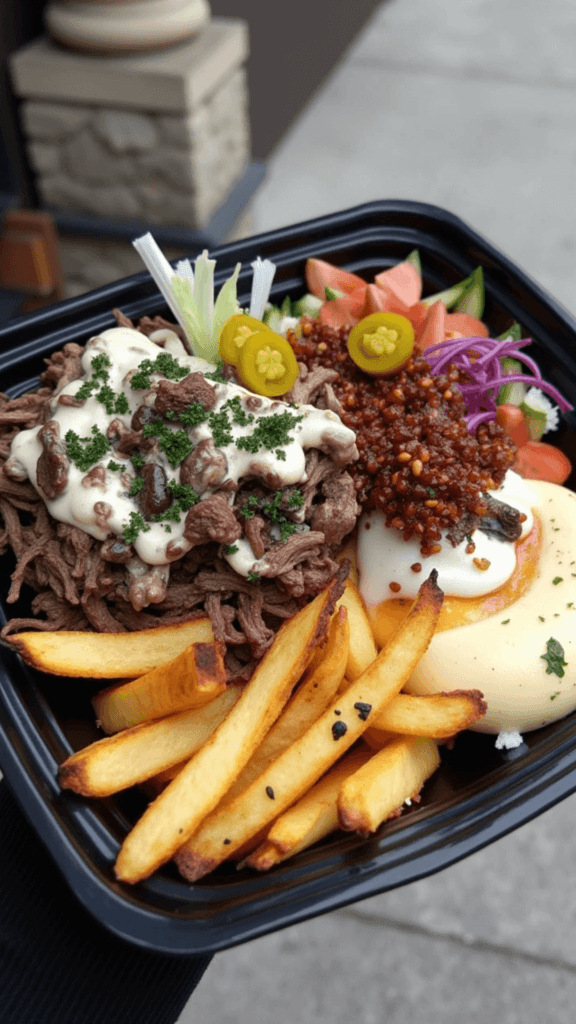
Bacon Mac n Cheese Burger Wrap: The Ultimate Indulgence
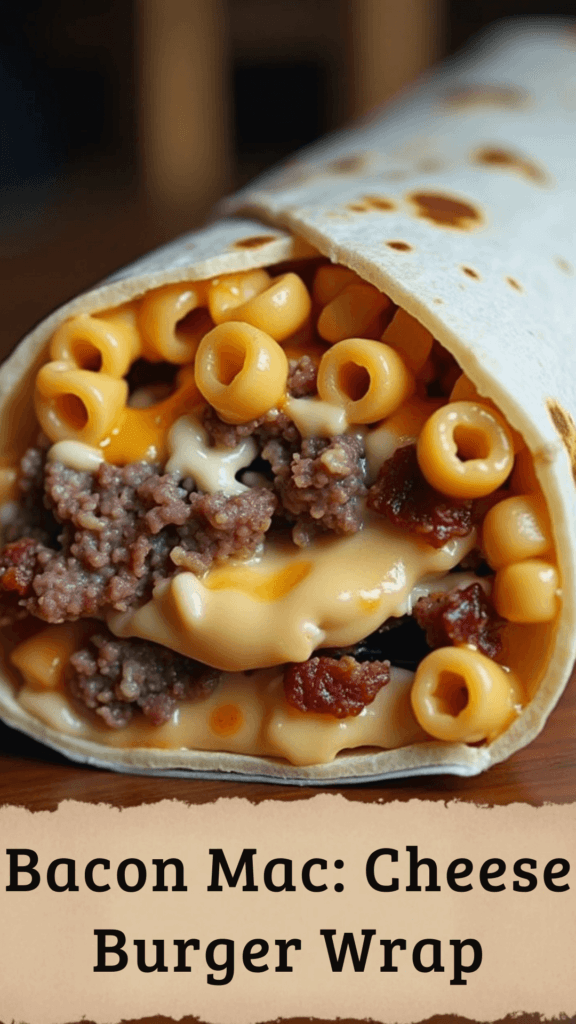
Why choose between a burger, mac n cheese, and bacon when you can have it all wrapped up? This creation takes comfort food to a whole new level. A juicy burger patty, creamy macaroni and cheese, and crispy bacon all bundled in a tortilla and likely grilled. It’s over-the-top in the best way possible, making it one of the best recipes for pure, unadulterated indulgence.
Ingredients
- 1 lb ground beef, formed into 2-4 thin patties (depending on wrap size)
- Salt and pepper to taste
- 4-8 slices bacon, cooked until crispy
- Approx. 2 cups prepared macaroni and cheese (homemade or good quality boxed)
- 2-4 large (burrito size) flour tortillas
- Optional: Shredded cheddar cheese, BBQ sauce, ranch dressing
Steps:
- Cook Components: Cook the burger patties in a skillet until done to your liking; season with salt and pepper. Cook the bacon until crispy; crumble or leave in strips. Prepare the macaroni and cheese according to its directions – make sure it’s nice and creamy.
- Warm Tortillas: Briefly warm the large flour tortillas to make them pliable.
- Assemble: Lay a tortilla flat. Place a burger patty (or half of one, depending on size) slightly off-center. Top the patty with a generous scoop of macaroni and cheese. Add crumbled bacon (or strips) over the mac n cheese. Add optional shredded cheese or drizzles of sauce here if desired.
- Wrap It Up: Carefully fold in the sides of the tortilla first, then tightly roll the tortilla up from the bottom, enclosing all the fillings like a burrito.
- Grill (Optional but Recommended): Heat a clean skillet or griddle over medium heat (add a little butter or oil if desired). Place the wrap seam-side down and grill for 2-3 minutes until golden brown and slightly crispy. Carefully flip and grill the other side.
- Serve: Slice in half (beware of molten mac n cheese!) and serve immediately. This wrap is definitely one of the best recipes when you’re looking for ultimate comfort food.
Irresistible Vanilla French Beignets You Must Try: Pillows of Perfection

Transport yourself straight to Café Du Monde with these light, airy, pillowy squares of fried dough, generously dusted with powdered sugar. French beignets, especially with a hint of vanilla, are simpler than donuts but just as delightful. They are truly one of the best recipes for a special breakfast, brunch, or dessert.
Ingredients
- 3/4 cup lukewarm water (about 105-115°F or 40-46°C)
- 1 packet (1/4 oz or 2 1/4 tsp) active dry yeast
- 1/4 cup granulated sugar
- 1 large egg, beaten
- 1/2 cup evaporated milk (or whole milk)
- 1 tsp vanilla extract
- 1/2 tsp salt
- 3 1/2 – 4 cups all-purpose flour, plus more for dusting
- 2 tbsp shortening or unsalted butter, softened
- Vegetable oil or canola oil, for deep frying (about 3-4 inches deep)
- Plenty of powdered sugar, for dusting
Steps:
- Activate Yeast: In a large bowl (or the bowl of a stand mixer), combine the lukewarm water and yeast. Let sit for 5-10 minutes until foamy.
- Mix Wet Ingredients: Stir the sugar, beaten egg, evaporated milk, vanilla extract, and salt into the yeast mixture.
- Add Flour & Fat: If using a stand mixer, attach the dough hook. Gradually add about 3 1/2 cups of flour to the wet ingredients, mixing on low speed. Add the softened shortening or butter. Mix until a soft, slightly sticky dough forms. If the dough is too sticky, add the remaining 1/2 cup of flour, a little at a time.
- Knead Dough: Knead the dough on a lightly floured surface (or with the dough hook) for 5-8 minutes until smooth and elastic.
- First Rise: Place the dough in a lightly oiled bowl, turning to coat. Cover the bowl tightly with plastic wrap and let the dough rise in a warm place for 1.5 – 2 hours, or until doubled in size.
- Roll & Cut: Punch down the risen dough. Turn it out onto a well-floured surface. Roll the dough out into a rectangle about 1/4 inch thick. Using a sharp knife or pizza cutter, cut the dough into 2-3 inch squares.
- Heat Oil: Pour oil into a heavy-bottomed pot or Dutch oven to a depth of 3-4 inches. Heat the oil over medium-high heat until it reaches 360-370°F (182-188°C). Use a thermometer for accuracy.
- Fry Beignets: Carefully place 3-4 squares of dough into the hot oil (don’t overcrowd the pot). They should puff up quickly. Fry for 1-2 minutes per side, flipping once, until golden brown.
- Drain & Dust: Use a slotted spoon or spider strainer to remove the beignets from the hot oil, letting excess oil drip off. Place them on a wire rack lined with paper towels. While still warm, generously dust (or practically bury!) the beignets with powdered sugar.
- Serve Immediately: Beignets are best enjoyed fresh and hot! This is simply one of the best recipes for a classic New Orleans treat.
Parmesan Zucchini Fries: A Healthier Fry Alternative
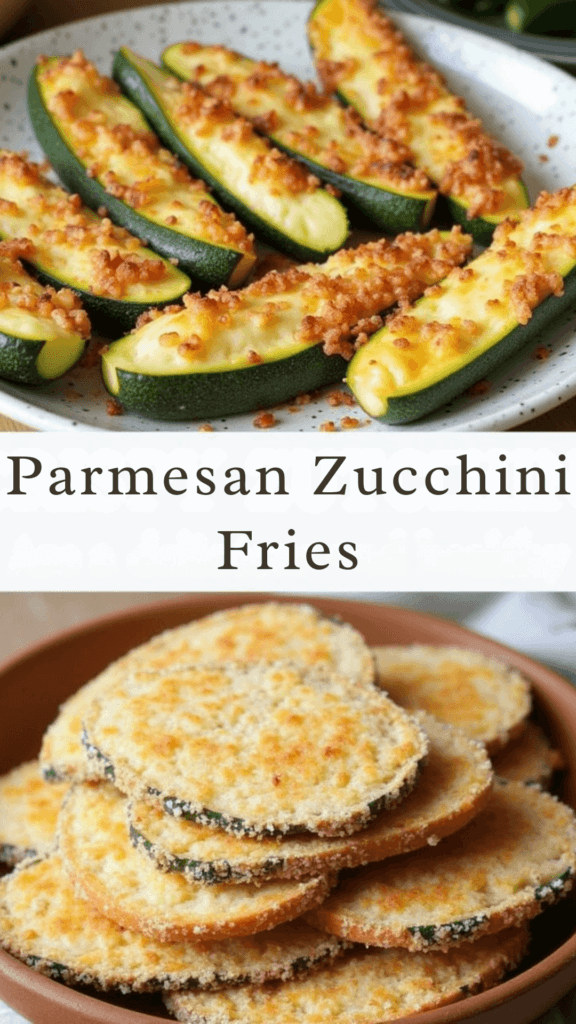
Craving something crispy and savory like French fries, but want a veggie boost? Parmesan Zucchini Fries are the answer! Strips of zucchini coated in a cheesy, seasoned crust and baked or air-fried until golden and crisp. They’re one of the best recipes for a delicious side dish or snack that feels indulgent but is packed with goodness.
Ingredients
- 2 medium zucchini
- 1/4 cup all-purpose flour (or almond flour for gluten-free)
- 1 tsp salt, divided
- 1/2 tsp black pepper
- 2 large eggs, beaten
- 1/2 cup Panko breadcrumbs (or regular breadcrumbs)
- 1/4 cup grated Parmesan cheese
- 1/2 tsp garlic powder
- 1/2 tsp dried oregano or Italian seasoning
- Cooking spray or olive oil
- Optional: Marinara sauce or ranch dressing for dipping
Steps:
- Prep Zucchini: Wash zucchini and trim off the ends. Cut each zucchini in half crosswise, then cut each half lengthwise into sticks about 1/2 inch thick (like thick-cut fries). Pat the zucchini sticks dry with paper towels – this is important for crispiness.
- Set Up Breading Station: Prepare three shallow dishes or plates.
- Dish 1: Combine flour, 1/2 tsp salt, and black pepper.
- Dish 2: Beat the eggs.
- Dish 3: Combine Panko breadcrumbs, grated Parmesan cheese, garlic powder, remaining 1/2 tsp salt, and dried herbs. Mix well.
- Bread Zucchini: Working one stick at a time, dredge a zucchini stick in the flour mixture, shaking off excess. Dip it completely into the beaten egg, letting excess drip off. Finally, press the stick firmly into the Panko-Parmesan mixture, coating all sides well. Place the breaded stick on a baking sheet lined with parchment paper or onto an air fryer tray sprayed with cooking spray. Repeat with all zucchini sticks.
- Cook (Choose Method):
- Baking: Preheat oven to 425°F (220°C). Arrange breaded zucchini sticks in a single layer on the parchment-lined baking sheet. Spray the tops lightly with cooking spray or drizzle with olive oil. Bake for 15-20 minutes, flipping halfway through, until golden brown and crispy.
- Air Frying: Preheat air fryer to 400°F (200°C). Place breaded zucchini sticks in the air fryer basket in a single layer (work in batches if needed, don’t overcrowd). Spray lightly with cooking spray. Air fry for 8-12 minutes, shaking the basket halfway through, until golden and crisp.
- Serve: Serve immediately while hot and crispy. Offer marinara sauce or ranch dressing for dipping. These are one of the best recipes for a tasty veggie side!
Chocolate Chip Cheesecake Cookies: Two Desserts in One Bite

Can’t decide between chocolate chip cookies and cheesecake? Why not have both? These cookies feature a delightful swirl or pocket of creamy cheesecake filling baked right into (or onto) a delicious chocolate chip cookie base. They offer the best of both worlds, making them one of the best recipes for cookie lovers looking for something extra special.
Ingredients
- For the Chocolate Chip Cookie Dough:
- Use the dough from the “Golden Melt Chocolate Chip Cookies” recipe above (or your favorite recipe/store-bought dough) – prepare up to the chilling step.
- For the Cheesecake Filling:
- 4 oz cream cheese, softened
- 3 tbsp granulated sugar
- 1 large egg yolk
- 1/4 tsp vanilla extract
Steps:
- Prepare Cookie Dough: Make your chocolate chip cookie dough and chill it as directed in the “Golden Melt” recipe (or use chilled store-bought dough).
- Make Cheesecake Filling: In a small bowl, beat the softened cream cheese with an electric mixer (or by hand) until smooth. Beat in the sugar, then the egg yolk and vanilla extract until just combined and smooth.
- Prep for Baking: Preheat oven to 375°F (190°C). Line baking sheets with parchment paper.
- Assemble Cookies (Two Methods):
- Method 1 (Thumbprint Style): Scoop balls of chilled cookie dough (about 1.5-2 tbsp each) onto the prepared baking sheets. Use your thumb or the back of a small spoon to make an indentation in the center of each dough ball. Fill the indentation with about 1-2 teaspoons of the cheesecake filling.
- Method 2 (Swirl Style – requires slightly softer dough): Scoop balls of cookie dough. Flatten them slightly. Drop a small dollop (about 1 tsp) of cheesecake filling onto the center. Gently fold the cookie dough partially over the filling or use a toothpick to gently swirl the cheesecake into the top layer of the cookie dough (don’t mix it all the way through).
- Bake: Bake for 10-14 minutes, or until the cookie edges are golden brown and the cheesecake filling is set (it shouldn’t look wet or jiggly). The exact time depends on the size and method.
- Cool: Let the cookies cool on the baking sheets for about 10 minutes before transferring them to a wire rack to cool completely. The cheesecake filling will firm up more as it cools.
- Store: Store these cookies in an airtight container in the refrigerator due to the cheesecake filling. They are definitely one of the best recipes for a unique cookie experience!
Savory Slaw & Ranch Chicken Melt: A Flavor-Packed Sandwich
This isn’t your average chicken sandwich. Tender cooked chicken (shredded or sliced) gets tossed with creamy ranch dressing and piled onto bread with melty cheese and a tangy, crunchy coleslaw. Grilled to perfection, it’s a delightful combination of textures and flavors, making it one of the best recipes for a satisfying lunch or casual dinner.
Ingredients
- 2 cups cooked chicken, shredded or chopped (rotisserie chicken works great!)
- 1/4 – 1/3 cup ranch dressing, plus more for drizzling if desired
- 4 slices sturdy bread (sourdough, thick white, or rye work well)
- Butter or mayonnaise, for grilling the bread
- 4 slices cheese (provolone, Monterey Jack, cheddar, or Swiss)
- For the Savory Slaw:
- 1 cup shredded coleslaw mix (cabbage and carrots)
- 2 tbsp mayonnaise
- 1 tsp apple cider vinegar
- 1/2 tsp sugar (optional)
- Salt and pepper to taste
Steps:
- Make Slaw: In a small bowl, whisk together the mayonnaise, apple cider vinegar, sugar (if using), salt, and pepper for the slaw dressing. Add the shredded coleslaw mix and toss to coat evenly. Set aside (you can make this slightly ahead).
- Mix Chicken: In another bowl, combine the cooked chicken with the ranch dressing. Stir until the chicken is well coated.
- Assemble Melts: Spread butter or mayonnaise on one side of each slice of bread. Place two slices butter-side down in a large skillet or on a griddle over medium heat.
- Layer: On each bread slice in the skillet, layer the following: one slice of cheese, half of the ranch chicken mixture, a generous scoop of the savory slaw, and another slice of cheese.
- Top & Grill: Place the remaining two slices of bread on top, butter-side up. Grill for 3-5 minutes per side, or until the bread is golden brown and crispy, and the cheese is melted and gooey. Press down gently with a spatula occasionally.
- Serve: Carefully remove the melts from the skillet. Slice in half diagonally if desired. Serve immediately, perhaps with extra ranch for dipping. This combination makes it one of the best recipes for a unique and tasty melt!
Shrimp Grilled Cheese Sandwich: A Seafood Twist on a Classic
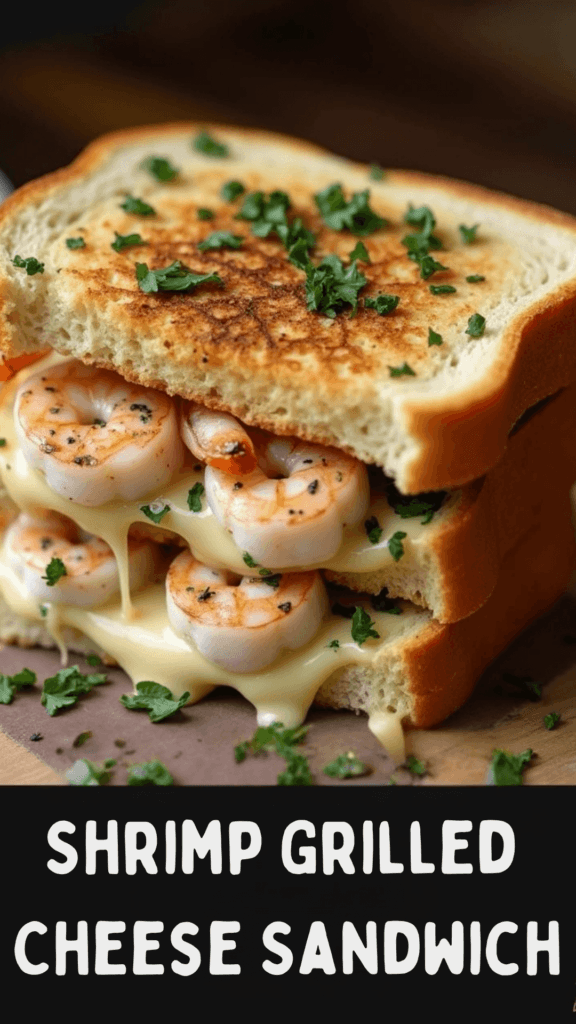
Elevate the humble grilled cheese! This version adds succulent, seasoned shrimp to the classic combination of buttery, toasted bread and melted cheese. It’s a surprisingly delicious pairing and one of the best recipes for putting a gourmet spin on comfort food.
Ingredients
- 1/2 lb medium shrimp, peeled, deveined, and tails removed, roughly chopped
- 1/2 tbsp olive oil or butter
- 1 clove garlic, minced
- Salt, pepper, and paprika (or Old Bay seasoning) to taste
- 4 slices sturdy bread (sourdough, challah, or brioche are nice)
- Butter or mayonnaise, for grilling
- 4-6 slices cheese (Gruyère, Monterey Jack, Havarti, or Provolone work well – mix and match!)
- Optional: Chopped fresh chives or parsley, squeeze of lemon juice
Steps:
- Cook Shrimp: Heat olive oil or butter in a small skillet over medium heat. Add the chopped shrimp and minced garlic. Season with salt, pepper, and paprika (or Old Bay). Cook, stirring, for just 2-3 minutes until the shrimp are pink and cooked through. Don’t overcook. Remove from heat, stir in optional chives/parsley and a tiny squeeze of lemon juice if desired. Set aside.
- Assemble Sandwiches: Spread butter or mayonnaise on one side of each slice of bread. Place two slices butter-side down in a large skillet or on a griddle over medium-low heat.
- Layer: On each bread slice in the skillet, layer half of the cheese slices. Divide the cooked shrimp mixture evenly over the cheese. Top with the remaining cheese slices.
- Top & Grill: Place the remaining bread slices on top, butter-side up. Grill slowly over medium-low heat for 4-6 minutes per side. You want the bread golden brown and crispy, and the cheese thoroughly melted without burning the bread. Press gently with a spatula.
- Serve: Once golden and melted, remove from the skillet. Let sit for a minute before slicing in half. This surprising combo is definitely one of the best recipes for an adventurous grilled cheese lover!
Savory Bowtie Beef Pasta: A Hearty and Flavorful Meal
This dish is pure comfort in a bowl. Tender ground beef simmered in a rich, savory tomato-based sauce, tossed with perfectly cooked bowtie pasta (farfalle). It’s often enhanced with vegetables and cheese, making it one of the best recipes for a satisfying weeknight family dinner that everyone will love.
Ingredients
- 1 lb ground beef
- 1 large onion, chopped
- 2-3 cloves garlic, minced
- Optional Veggies: 1 chopped bell pepper, 1 cup sliced mushrooms, 1 grated carrot
- 1 can (28 oz) crushed tomatoes
- 1 can (15 oz) tomato sauce
- 1/2 cup beef broth or red wine
- 1 tsp dried oregano
- 1 tsp dried basil
- 1/2 tsp salt (or to taste)
- 1/4 tsp black pepper
- Pinch of red pepper flakes (optional)
- 1 lb bowtie (farfalle) pasta
- Optional Toppings: Grated Parmesan cheese, shredded mozzarella, fresh parsley
Steps:
- Cook Pasta: Cook the bowtie pasta according to package directions until al dente. Drain, reserving about 1/2 cup of the pasta water, and set aside.
- Brown Beef & Veggies: While pasta cooks, brown the ground beef in a large pot or Dutch oven over medium-high heat, breaking it up. Drain excess grease. Add the chopped onion (and other optional veggies like bell pepper, mushrooms, carrot) and cook until softened, about 5-7 minutes. Add the minced garlic and cook for another minute until fragrant.
- Simmer Sauce: Stir in the crushed tomatoes, tomato sauce, beef broth (or wine), oregano, basil, salt, pepper, and red pepper flakes (if using). Bring the sauce to a simmer.
- Combine & Finish: Reduce heat to low, cover, and let the sauce simmer for at least 15-20 minutes (or longer for deeper flavor), stirring occasionally. If the sauce seems too thick, add a splash of the reserved pasta water.
- Mix with Pasta: Stir the cooked bowtie pasta into the meat sauce until well combined. Cook for another minute or two to let the pasta absorb some sauce. Alternatively, serve the sauce over the pasta.
- Serve: Serve hot, topped generously with grated Parmesan or shredded mozzarella cheese and chopped fresh parsley, if desired. This is truly one of the best recipes for a classic, hearty pasta night.
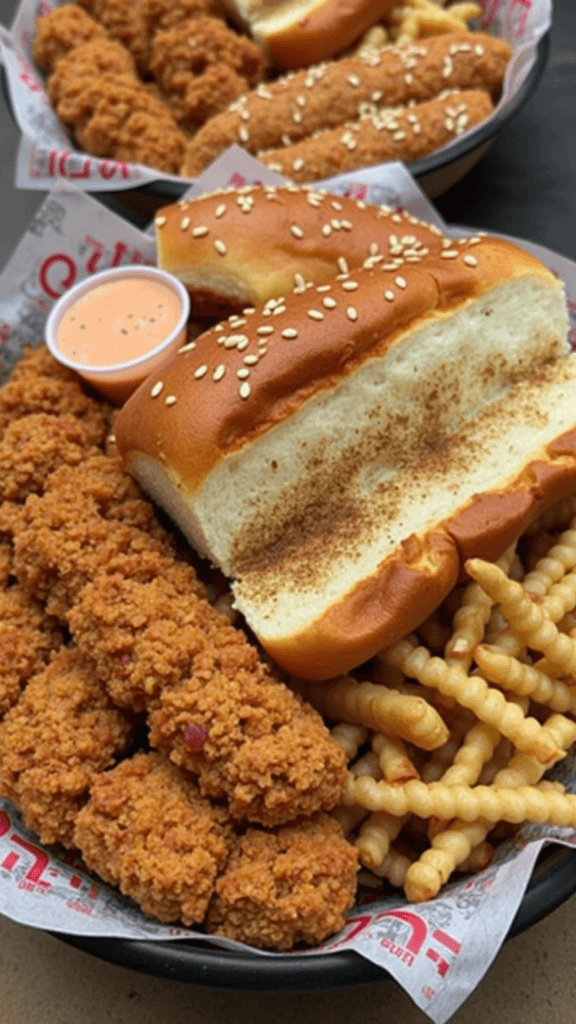
Chicken Crunch Combo with Toasted Bun Bliss: Crispy Chicken Sandwich Perfection
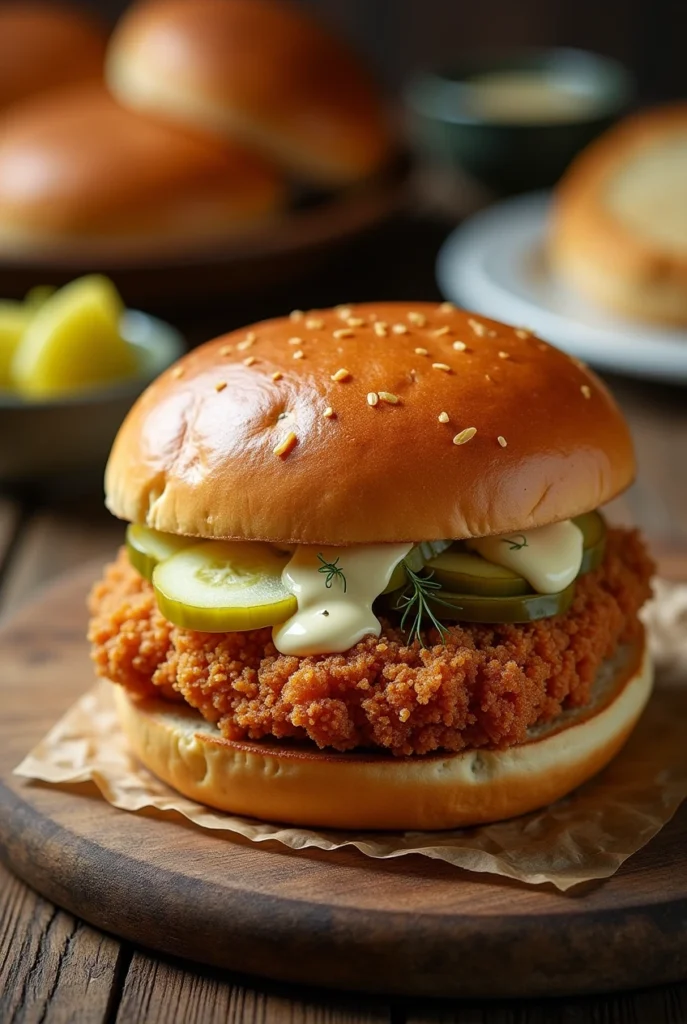
Forget drive-thru disappointments. This recipe focuses on achieving that ultimate crispy chicken sandwich experience at home: perfectly crunchy, juicy fried chicken served on a soft, toasted bun with simple, classic toppings. It’s one of the best recipes when you crave that satisfying crunch and flavor combo.
Ingredients
- For the Chicken:
- 2 boneless, skinless chicken breasts, pounded to 1/2-inch thickness and cut in half (to make 4 cutlets)
- 1 cup buttermilk
- 1 tbsp hot sauce (optional, for marinade)
- 1 1/2 cups all-purpose flour
- 1/2 cup cornstarch (for extra crunch)
- 2 tsp salt
- 1 tsp black pepper
- 1 tsp paprika
- 1/2 tsp garlic powder
- 1/2 tsp onion powder
- Vegetable or canola oil, for frying (about 1-2 inches deep)
- For Assembly:
- 4 soft burger buns (brioche or potato buns are great)
- Butter, for toasting buns
- Mayonnaise
- Dill pickle slices (chips or spears)
Steps:
- Marinate Chicken: In a bowl or ziplock bag, combine buttermilk and hot sauce (if using). Add the chicken cutlets, ensuring they are fully submerged. Marinate in the refrigerator for at least 30 minutes, or preferably 1-2 hours (or even overnight).
- Prep Breading: In a shallow dish, whisk together the flour, cornstarch, salt, pepper, paprika, garlic powder, and onion powder.
- Heat Oil: Pour oil into a large, heavy-bottomed skillet or Dutch oven to a depth of 1-2 inches. Heat over medium-high heat until it reaches 350°F (175°C).
- Bread Chicken: Remove chicken cutlets from the buttermilk marinade, letting excess drip off (don’t wipe it dry). Dredge each cutlet thoroughly in the flour mixture, pressing firmly to ensure the coating adheres well. Coat all sides.
- Fry Chicken: Carefully place 2 breaded chicken cutlets into the hot oil (don’t overcrowd). Fry for 4-6 minutes per side, flipping once, until golden brown, crispy, and cooked through (internal temperature should reach 165°F/74°C). Adjust heat as needed to maintain oil temperature and prevent burning.
- Drain: Remove cooked chicken from oil and place on a wire rack set over paper towels to drain excess oil. Repeat frying with remaining chicken cutlets.
- Toast Buns: While the chicken rests, lightly butter the cut sides of the buns. Toast them in a separate skillet, on a griddle, or under the broiler until golden brown.
- Assemble: Spread mayonnaise on the cut sides of the toasted buns. Place a crispy chicken cutlet on the bottom bun. Top generously with dill pickle slices. Place the top bun on.
- Serve: Serve immediately for maximum crunch! This homemade version is one of the best recipes for a truly satisfying crispy chicken sandwich.
Nutritional Insights for Some of Our Best Recipes
Nutrition information can vary greatly depending on specific ingredients, brands, and portion sizes used. The following table provides estimated nutritional values per serving for a selection of these recipes as a general guideline. Always calculate based on your specific ingredients for accuracy.
| Recipe | Est. Calories | Est. Protein (g) | Est. Carbs (g) | Est. Fat (g) | Notes |
| Loaded Beef and Fries Bowl | 650-850 | 30-40 | 50-70 | 35-50 | Highly variable based on toppings/fries |
| Stuffed Vegetable Roll (Puff Pastry) | 400-550 | 8-12 | 30-40 | 25-35 | Per slice, depends on size/filling |
| Louisiana Red Beans and Rice | 450-600 | 20-30 | 60-80 | 10-20 | With sausage, served over 1 cup rice |
| Tater Tot Breakfast Bowl | 700-900 | 25-35 | 40-55 | 45-60 | With gravy, sausage, no egg/cheese added |
| Parmesan Zucchini Fries | 150-250 | 8-12 | 15-20 | 8-14 | Baked, per serving (approx. 1/2 zucchini) |
| Savory Bowtie Beef Pasta | 500-700 | 30-40 | 55-75 | 15-25 | Depends on beef leanness/cheese |
| Chicken Crunch Combo Sandwich | 600-800 | 35-45 | 45-60 | 25-40 | Fried chicken, mayo, bun, pickles |
Disclaimer: These values are rough estimates.
Frequently Asked Questions About Finding the Best Recipes
People often have questions when searching for top-notch meal ideas. Here are a few common ones:
What makes a recipe one of the “best”?
This is subjective, but generally, the best recipes strike a balance between great flavor, achievable instructions, reliable results, and satisfying textures. They often use quality ingredients and have clear steps that lead to a delicious outcome consistently. Many of the best recipes also evoke comfort or excitement.
How can I find easy but delicious recipes?
Look for recipes with shorter ingredient lists, fewer complex steps, and reasonable cooking times. Keywords like “quick,” “easy,” “30-minute,” or “one-pan” can help. Many websites and blogs categorize recipes by difficulty. The best recipes aren’t always the most complicated! Some dishes on our list, like the Mozzarella Pepperoni Croissant Rolls or Cajun Shrimp, are quite simple.
Where can I find unique and creative recipe ideas?
Explore food blogs (like this one!), Pinterest, Instagram (#food), cooking magazines, and international cuisine websites. Don’t be afraid to look for fusion recipes or modern takes on classics. Mashups like the Bacon Mac n Cheese Burger Wrap or Buffalo Chicken Cheesesteak are great examples of creative combinations that result in some of the best recipes for adventurous eaters.
How do I adapt recipes if I have dietary restrictions?
Many modern recipes offer substitution suggestions (e.g., gluten-free flour, dairy-free milk, plant-based meat alternatives). Look for recipes specifically tagged for your needs (vegan, gluten-free, keto, etc.). Understanding basic ingredient swaps is key – applesauce for oil, flax eggs for eggs, etc. Many of the best recipes can be adapted with a little know-how.
What’s the best way to organize recipes I find?
You can use digital tools like Pinterest boards, recipe apps (like Paprika, AnyList), or simply bookmark pages in your browser. For physical recipes, a binder with clear plastic sleeves or a recipe box works well. Organizing by course (breakfast, dinner, dessert) or main ingredient can make finding your saved best recipes easier later on.
(Conclusion)
Wow, what a culinary journey! From the sweet simplicity of Mini Pineapple Upside Down Cakes to the bold fusion of a Bacon Mac n Cheese Burger Wrap, we’ve explored a truly diverse collection aiming to deliver some of the absolute best recipes out there. Whether you’re craving comforting classics like Red Beans and Rice, seeking quick weeknight solutions like Cajun Shrimp, or ready to indulge in gourmet treats like Brioche Donuts, there’s something here to spark your culinary creativity.